

Discover the Kitchen Tool Everyone Is Raving About!
- • Precision Engineered: Sharp blade with durable craftsmanship.
- • Comfort First: Ergonomic design for effortless slicing.
- • Stylish & Strong: Elegant wood handle meets stainless steel strength.
- • Risk-Free Pick: Thousands of happy home chefs can’t be wrong.
- • Today’s Deal: Just $29.95 instead of $99.85 — limited-time offer!
This post may include affiliate links — learn more here .
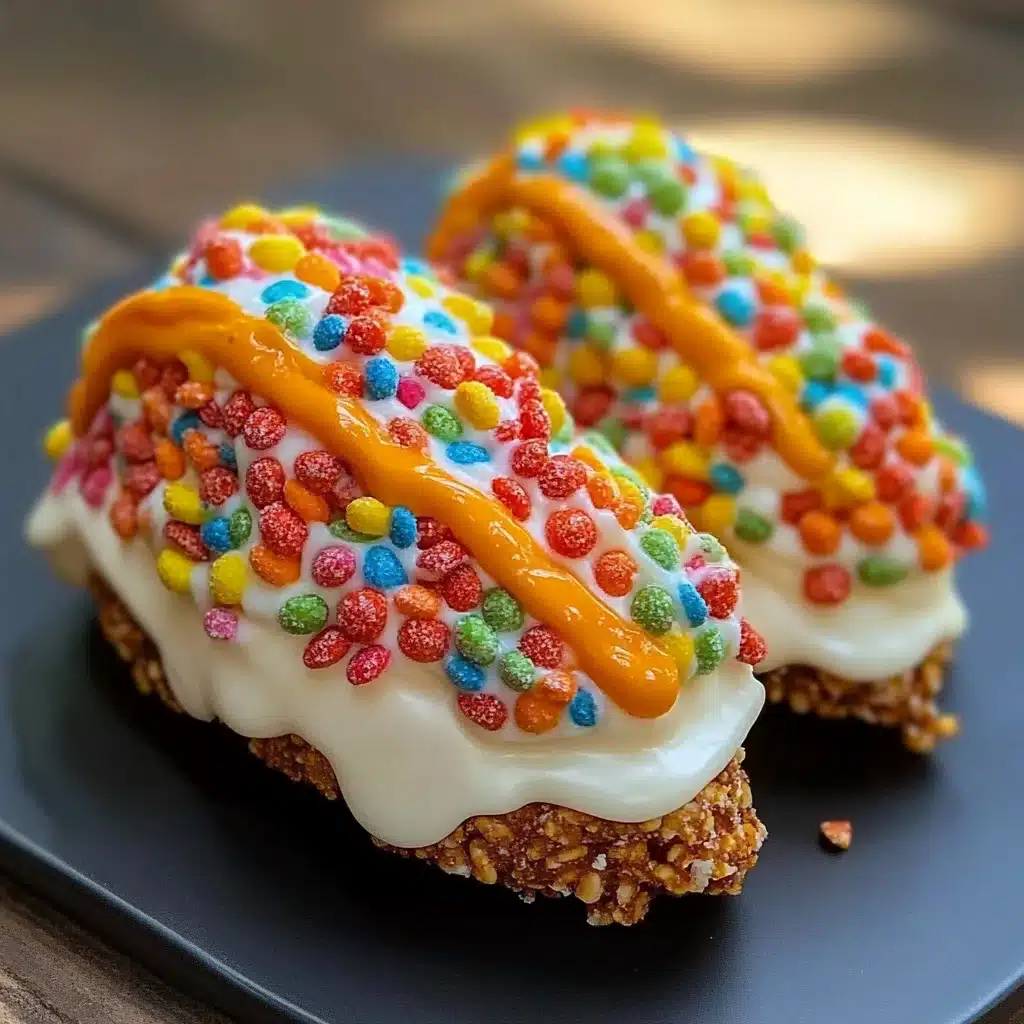
Fruity Pebbles Cheesecake Tacos is an amazing, colorful dessert that seamlessly combines two beloved treats into one. These delightful tacos are filled with creamy cheesecake wrapped in a crunchy shell, topped with rainbow-colored Fruity Pebbles. This dessert takes your taste buds on an exciting adventure, bringing together the nostalgia of cereal and the decadence of cheesecake. It’s a wonderful treat for parties, kids’ birthdays, or simply when you crave something fun and sweet.
Imagine the vibrant colors of Fruity Pebbles rising to the occasion in a beautiful presentation. The first bite reveals a blend of flavors and textures that make you feel like a kid again. The crunchy shell perfectly contrasts the creamy filling, while the cereal adds a delightful crunch. You’ll find that this recipe not only satisfies your sweet tooth but also sparks joy, making it a hit wherever it’s served.
In this comprehensive guide, you will discover why this recipe is a must-try and how to make your own Fruity Pebbles Cheesecake Tacos. Open your kitchen to a world of flavor and fun with this unique twist on cheesecake. Let’s dive deeper into what makes Fruity Pebbles Cheesecake Tacos such a fantastic dessert!
Why You’ll Love This Recipe
There are countless reasons to fall in love with Fruity Pebbles Cheesecake Tacos. Each component, from the shell to the filling, offers something special. Here are just a few things to love about this delightful dessert:
1. Easy to Make – This recipe uses straightforward steps that anyone can follow, even if you’re not an expert baker.
2. Colorful Presentation – The vibrant colors of Fruity Pebbles make these tacos visually appealing and perfect for celebrations.
3. Versatile Ingredients – You can customize the filling with various flavors or adjust the toppings according to your preferences.
4. Fun for All Ages – Kids and adults alike will enjoy the playful nature of this dessert. It’s great for family gatherings!
5. Unique Taste Experience – The combination of creamy cheesecake and crispy cereal is a match made in dessert heaven.
6. Perfect for Any Occasion – Whether it’s a birthday party, picnic, or holiday gathering, these tacos will surely impress.
This dessert combines nostalgia and innovation in every delicious bite. If you’re looking for a sweet treat that is as fun to make as it is to eat, your search ends here.
Preparation and Cooking Time
Creating these Fruity Pebbles Cheesecake Tacos takes approximately 1 hour and 30 minutes. Here’s a breakdown of the time required:
– Preparation Time: 40 minutes
– Chilling Time: 30 minutes
– Assembly Time: 20 minutes
These times may vary slightly depending on your kitchen skills and equipment, but they should serve as a good estimation for planning your cooking schedule.
Ingredients
– For the Taco Shells:
– 1 cup all-purpose flour
– 1/4 cup granulated sugar
– 1/4 teaspoon salt
– 1/2 cup unsweetened cocoa powder
– 1/4 cup vegetable oil
– 3 tablespoons cold water
– 1 teaspoon vanilla extract
– For the Cheesecake Filling:
– 8 ounces cream cheese, softened
– 1/4 cup granulated sugar
– 1/2 teaspoon vanilla extract
– 1 cup heavy whipping cream
– 1/2 cup Fruity Pebbles, crushed (for the filling)
– For Topping:
– 1 cup Fruity Pebbles, whole
– Whipped cream (optional)
Step-by-Step Instructions

Creating your Fruity Pebbles Cheesecake Tacos can be an enjoyable and simple process if you follow these clear steps:
1. Preheat Oven: Start by preheating your oven to 350°F (175°C).
2. Make the Taco Shells: In a mixing bowl, combine the flour, sugar, salt, and cocoa powder. In another separate bowl, mix the oil, water, and vanilla extract. Gradually add the wet ingredients to the dry mixture. Stir until a dough forms.
3. Shape the Shells: Divide the dough into small balls. Roll each ball into thin circles, about 5 inches in diameter. Place them on a parchment-lined baking sheet.
4. Bake the Shells: Bake the dough circles in the preheated oven for 10-12 minutes. Remove them when they’re slightly firm but not completely crispy.
5. Form Tacos: While the shells are warm, gently shape them into taco molds. You can use an oven-safe rack or any curved surface to hold the shape as they cool.
6. Prepare the Cheesecake Filling: In a mixing bowl, beat the softened cream cheese until smooth. Add the sugar and vanilla extract, mixing until well incorporated.
7. Whip the Cream: In another bowl, whip the heavy cream until medium peaks form. Gently fold the whipped cream into the cream cheese mixture until just combined.
8. Add Fruity Pebbles to the Filling: Crush the Fruity Pebbles and incorporate them into the cheesecake filling.
9. Chill the Filling: Place the cheesecake filling in the fridge for about 30 minutes to firm up slightly.
10. Fill the Taco Shells: Once the shells are completely cooled, carefully fill each shell with the cheesecake filling using a piping bag or spoon.
11. Garnish: Top with additional whole Fruity Pebbles and whipped cream if desired.
12. Serve and Enjoy: Enjoy these delightful tacos immediately or keep them chilled until serving.
How to Serve
When it comes to serving Fruity Pebbles Cheesecake Tacos, consider the following tips to enhance your dessert experience:
1. Presentation: Use a fun serving platter to showcase your tacos; this will make them visually appealing.
2. Garnish: Consider adding extra toppings such as sprinkles or chocolate drizzle for an added flair.
3. Portion Sizes: Offer small servings so that your guests can have multiple tacos without overindulging.
4. Accompaniments: Pair with fresh fruits like strawberries or a scoop of ice cream for a more rounded dessert experience.
By putting thought into how you serve these delightful tacos, you create a fun and enjoyable dessert experience for you and your guests, leaving lasting memories of sweetness and joy.
In conclusion, Fruity Pebbles Cheesecake Tacos is an incredible dessert that combines delicious flavors with a whimsical presentation. This unique recipe is sure to wow everyone at your gathering and provides a joyful cooking experience. So gather your ingredients and get ready to delight your taste buds with this ultimate treat!
Additional Tips
– Use Fresh Ingredients: Fresh cream cheese and heavy whipping cream will enhance the flavor and texture of the cheesecake filling.
– Pipe with Precision: Using a piping bag can help you fill the taco shells neatly and ensure an even distribution of the filling.
– Serve Cold: Fruity Pebbles Cheesecake Tacos are best served chilled. This enhances the creamy texture of the filling and keeps the shells crisp.
– Experiment with Textures: For added crunch, consider incorporating crushed nuts or granola into the cheesecake filling.
Recipe Variation
Feel free to play around with this recipe! Here are a few fun variations you can try:
1. Chocolate Chip Addition: Fold mini chocolate chips into the cheesecake filling for extra sweetness.
2. Fruit-Flavored Filling: Substitute half of the cream cheese with fruit-flavored yogurt for a fruity twist in the filling.
3. Dairy-Free Option: Use dairy-free cream cheese and coconut cream to create a vegan-friendly version of this dessert.
Freezing and Storage
– Storage: To preserve their freshness, keep the cheesecake tacos in an airtight container in the refrigerator. They are best consumed within 2-3 days.
– Freezing: These tacos can be frozen for up to 1 month. Ensure they are well-wrapped or stored in a freezer-safe container to prevent freezer burn.
Special Equipment
While making Fruity Pebbles Cheesecake Tacos doesn’t require any special tools, a few items can help streamline your process:
– Mixing bowls of different sizes for mixing ingredients and assembling.
– A rolling pin to help form the taco shells evenly.
– A piping bag for easy filling of the taco shells.
– Baking sheets lined with parchment paper for easy cleanup during baking.
Frequently Asked Questions
Can I make the taco shells ahead of time?
Yes, you can prepare the taco shells a day before. Store them in an airtight container to keep them crisp.
What can I use instead of whipped cream?
You can use coconut whipped cream or a dairy-free alternative if you’re looking for a non-dairy option.
How long do these tacos keep in the refrigerator?
They should stay fresh for up to 2-3 days when stored properly in the fridge.
Can I add additional toppings?
Absolutely! Feel free to add chocolate syrup, sprinkles, or additional crushed Fruity Pebbles to the top for a more festive look.
Conclusion
Fruity Pebbles Cheesecake Tacos are not just a dessert; they’re an experience packed with flavor, nostalgia, and vibrant colors. The unique combination of creamy and crunchy elements makes them a delightful treat for any occasion. Whether you are hosting a party or simply want to satisfy your sweet cravings, this fun dessert is sure to impress. Try making these whimsical tacos, and let your creativity shine as you experiment with ingredients and presentation. Each bite will take you back to carefree childhood moments, making them even more enjoyable to indulge in. Craft your own Fruity Pebbles Cheesecake Tacos today, and watch as they become the highlight of your dessert spread!
Fruity Pebbles Cheesecake Tacos: An Incredible Ultimate Recipe

- Prep Time: 15 minutes
- Cook Time: 10-12 minutes
- Total Time: 0 hours
Ingredients
– For the Taco Shells:
– 1 cup all-purpose flour
– 1/4 cup granulated sugar
– 1/4 teaspoon salt
– 1/2 cup unsweetened cocoa powder
– 1/4 cup vegetable oil
– 3 tablespoons cold water
– 1 teaspoon vanilla extract
– For the Cheesecake Filling:
– 8 ounces cream cheese, softened
– 1/4 cup granulated sugar
– 1/2 teaspoon vanilla extract
– 1 cup heavy whipping cream
– 1/2 cup Fruity Pebbles, crushed (for the filling)
– For Topping:
– 1 cup Fruity Pebbles, whole
– Whipped cream (optional)
Instructions
Creating your Fruity Pebbles Cheesecake Tacos can be an enjoyable and simple process if you follow these clear steps:
1. Preheat Oven: Start by preheating your oven to 350°F (175°C).
2. Make the Taco Shells: In a mixing bowl, combine the flour, sugar, salt, and cocoa powder. In another separate bowl, mix the oil, water, and vanilla extract. Gradually add the wet ingredients to the dry mixture. Stir until a dough forms.
3. Shape the Shells: Divide the dough into small balls. Roll each ball into thin circles, about 5 inches in diameter. Place them on a parchment-lined baking sheet.
4. Bake the Shells: Bake the dough circles in the preheated oven for 10-12 minutes. Remove them when they’re slightly firm but not completely crispy.
5. Form Tacos: While the shells are warm, gently shape them into taco molds. You can use an oven-safe rack or any curved surface to hold the shape as they cool.
6. Prepare the Cheesecake Filling: In a mixing bowl, beat the softened cream cheese until smooth. Add the sugar and vanilla extract, mixing until well incorporated.
7. Whip the Cream: In another bowl, whip the heavy cream until medium peaks form. Gently fold the whipped cream into the cream cheese mixture until just combined.
8. Add Fruity Pebbles to the Filling: Crush the Fruity Pebbles and incorporate them into the cheesecake filling.
9. Chill the Filling: Place the cheesecake filling in the fridge for about 30 minutes to firm up slightly.
10. Fill the Taco Shells: Once the shells are completely cooled, carefully fill each shell with the cheesecake filling using a piping bag or spoon.
11. Garnish: Top with additional whole Fruity Pebbles and whipped cream if desired.
12. Serve and Enjoy: Enjoy these delightful tacos immediately or keep them chilled until serving.
Nutrition
- Serving Size: 12 tacos
- Calories: 250 kcal
- Fat: 11g
- Protein: 3g