

Discover the Kitchen Tool Everyone Is Raving About!
- • Precision Engineered: Sharp blade with durable craftsmanship.
- • Comfort First: Ergonomic design for effortless slicing.
- • Stylish & Strong: Elegant wood handle meets stainless steel strength.
- • Risk-Free Pick: Thousands of happy home chefs can’t be wrong.
- • Today’s Deal: Just $29.95 instead of $99.85 — limited-time offer!
This post may include affiliate links — learn more here .
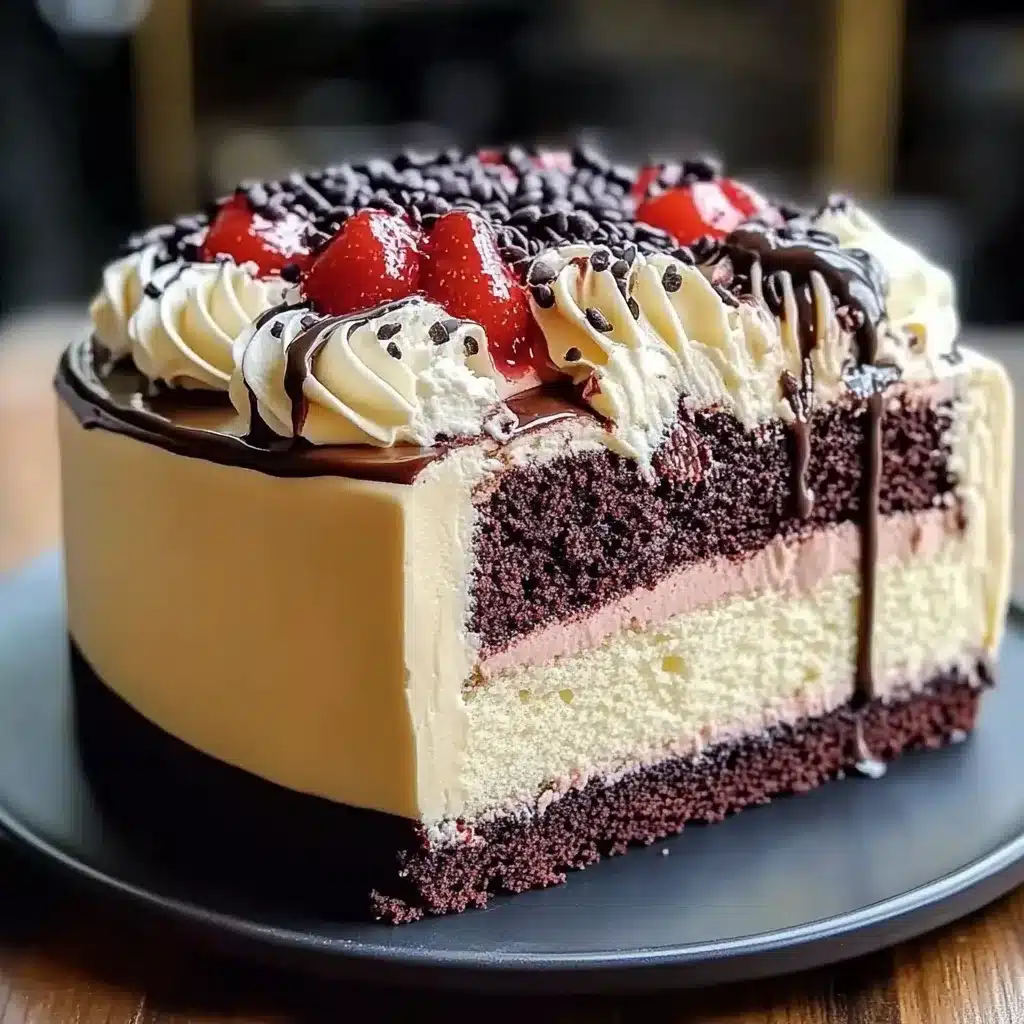
Love cake layers are a delightful treat that brings joy to any occasion. With their rich flavors and stunning presentation, these cakes have gained immense popularity among dessert lovers. Be it a birthday, anniversary, or just a simple weekend indulgence, their multi-layered design adds a touch of elegance and love to your gatherings. Whether you’re a seasoned baker or just starting out, this incredible recipe will leave everyone craving more.
Crafting love cake layers is not just about mixing ingredients; it’s about creating an experience. This cake tells a story with its careful construction, making each slice a tantalizing journey for the palate. The combination of moist layers and luscious fillings creates an orchestra of flavors that dance delightfully on your tongue. As you dive into this guide, you’ll discover why this recipe embodies love, the preparation involved, and how you can make the most out of your baking adventure.
When you think of cakes, you might envision a single-layer dessert, but love cake layers take your cake game up several notches. With each layer offering a unique taste sensation, you will impress your guests and indulge yourself in a culinary masterpiece. Prepare to say goodbye to ordinary cakes and embrace this amazing journey towards creating the ultimate love cake layers that everyone will adore!
Why You’ll Love This Recipe
The amazing attributes of love cake layers make them irresistible. Here are several reasons why you’ll fall in love with this recipe:
1. Diverse Flavor Combinations: The layers can be customized to feature various flavors such as chocolate, vanilla, fruit, or even spice, providing a taste for every preference.
2. Impressive Layers: The beautiful presentation of multiple layers showcases your baking skills and elevates the cake to a centerpiece status.
3. Perfect for Any Celebration: Whether it’s a wedding, a birthday, or a casual family gathering, this cake is fitting for any occasion.
4. Easy to Personalize: The recipe allows you to adjust the fillings or toppings, making it uniquely suited to your taste or dietary needs.
5. Memorable Experience: Sharing love cake layers with loved ones creates moments that will be remembered and cherished for a long time.
6. Simple Yet Elegant: While it looks sophisticated, the step-by-step instructions make it accessible for bakers of all skill levels.
With these benefits, it’s easy to see why love cake layers are a beloved dessert. They combine beautiful aesthetics with amazing tastes that evoke warmth and joy.
Preparation and Cooking Time
Creating the ultimate love cake layers takes about 2 hours. Here’s how the timing breaks down:
– Preparation Time: 45 minutes
– Cooking Time: 60 minutes
– Cooling Time: 30 minutes
These times may vary a little depending on your experience level in the kitchen and the specific oven you use, but they provide a good estimate to plan your baking schedule.
Ingredients
– 2 cups all-purpose flour
– 1 ½ cups granulated sugar
– 1 cup unsweetened cocoa powder
– ½ teaspoon baking soda
– 1 teaspoon baking powder
– ½ teaspoon salt
– 1 cup whole milk
– ½ cup vegetable oil
– 3 large eggs
– 2 teaspoons vanilla extract
– 1 cup boiling water
– 1 cup frosting (chocolate or vanilla for layering)
– Fresh fruits or nuts for decoration (optional)
Step-by-Step Instructions

Creating your own love cake layers is a delightful process. Just follow these clear steps:
1. Preheat Oven: Set your oven to 350°F (175°C). Grease and flour three 9-inch round cake pans.
2. Mix Dry Ingredients: In a large bowl, sift together the flour, cocoa powder, baking soda, baking powder, and salt.
3. Combine Wet Ingredients: In another bowl, whisk together whole milk, vegetable oil, eggs, and vanilla extract until well combined.
4. Mix Together: Gradually add the wet ingredients to your dry mixture, stirring until the batter is smooth.
5. Add Boiling Water: Carefully stir in the boiling water to the batter. This will thin it out, which is normal.
6. Divide Batter: Pour the batter evenly into the prepared cake pans.
7. Bake: Place in the oven and bake for 30-35 minutes, or until a toothpick inserted in the center comes out clean.
8. Cool: Remove the cakes from the oven and let them cool in the pans for about 10 minutes. Then transfer them to wire racks to cool completely.
9. Frost Layers: Once cooled, place one layer on a serving platter. Spread a layer of frosting evenly on top. Repeat this with the other layers.
10. Decorate: Add fresh fruits, nuts, or sprinkles to enhance the appearance of your cake.
By following these steps, you can create fantastic love cake layers at home!
How to Serve
Presenting your love cake layers beautifully can enhance the overall experience. Here are some useful tips for serving:
1. Use a Cake Stand: Elevate your cake on a decorative cake stand to give it prominence.
2. Slice Carefully: Use a sharp knife to cut even slices, ensuring each portion has a balanced layer of cake and frosting.
3. Add Accompaniments: Serve your cake with a dollop of whipped cream or a scoop of ice cream for added delight.
4. Pair with Beverages: Consider serving with sweet tea, coffee, or a light dessert wine to complement the flavors.
5. Garnish: Add edible flowers or fresh fruits around the base for a stunning visual impact.
With these serving suggestions, you’ll not only taste an incredible dessert but also create a visual feast that your guests will remember!
Enjoy your journey into the world of love cake layers, where each slice encapsulates love and joy, making every occasion magical.
Additional Tips
– Use Quality Ingredients: For the best flavor, choose high-quality cocoa powder and vanilla extract. Fresh eggs also enhance the texture of your cake.
– Ensure Even Baking: Rotate the cake pans halfway through baking to promote uniform browning and avoid uneven layers.
– Cool Completely: Allow the layers to cool completely before frosting to prevent melting and ensure a flawless finish.
Recipe Variation
Feel free to get creative! Here are a few variations to try:
1. Carrot Cake Layers: Swap out the cocoa powder for grated carrots and add warm spices such as cinnamon and nutmeg for a delicious twist.
2. Lemon Zest: Incorporate lemon zest into the batter for a refreshing citrus flavor that complements your frosting beautifully.
3. Layering with Ganache: Use chocolate ganache between the layers instead of frosting for a richer taste and different texture.
Freezing and Storage
– Storage: Keep the cake covered in the refrigerator to maintain its freshness, which should last about 4-5 days.
– Freezing: You can freeze individual slices for up to 3 months. Ensure they are well-wrapped in plastic wrap or foil to prevent freezer burn before placing them in an airtight container.
Special Equipment
Here are some tools you will need to make love cake layers successfully:
– Mixing bowls: For combining the dry and wet ingredients.
– Electric mixer: To mix your batter smoothly and evenly.
– Cake pans: Three 9-inch round pans are ideal for a layered cake.
– Offset spatula: This is great for spreading frosting evenly on each layer.
– Cooling rack: To keep the cake layers from getting soggy while they cool.
Frequently Asked Questions
How do I know when the cake is done baking?
Insert a toothpick into the center of the cake; if it comes out clean, your cake is ready.
Can I make this cake ahead of time?
Absolutely! You can bake the layers a day before and store them in the refrigerator. Allowing the flavors to meld enhances the taste.
Is this cake suitable for dietary restrictions?
You can adapt the recipe to be gluten-free by using an all-purpose gluten-free flour blend.
Can I eliminate certain flavors, such as chocolate?
Definitely! Feel free to choose different flavors for your layers, like vanilla or red velvet, to suit your taste.
Conclusion
Creating love cake layers is not just about baking; it’s about crafting a beautiful dessert that brings people together. With its rich flavor combinations and visually stunning layers, this cake ensures joy for any celebration. While it may appear complex, this generous guide equips you with everything needed to accomplish it confidently. Baking love cake layers can become a cherished activity that results in delightful memories shared with family and friends!
Love Cake Layers: The Ultimate 7-Layer Recipe You’ll Adore
- Prep Time: 15 minutes
- Cook Time: 60 minutes
- Total Time: 1 hour 15 minutes
Ingredients
– 2 cups all-purpose flour
– 1 ½ cups granulated sugar
– 1 cup unsweetened cocoa powder
– ½ teaspoon baking soda
– 1 teaspoon baking powder
– ½ teaspoon salt
– 1 cup whole milk
– ½ cup vegetable oil
– 3 large eggs
– 2 teaspoons vanilla extract
– 1 cup boiling water
– 1 cup frosting (chocolate or vanilla for layering)
– Fresh fruits or nuts for decoration (optional)
Instructions
Creating your own love cake layers is a delightful process. Just follow these clear steps:
1. Preheat Oven: Set your oven to 350°F (175°C). Grease and flour three 9-inch round cake pans.
2. Mix Dry Ingredients: In a large bowl, sift together the flour, cocoa powder, baking soda, baking powder, and salt.
3. Combine Wet Ingredients: In another bowl, whisk together whole milk, vegetable oil, eggs, and vanilla extract until well combined.
4. Mix Together: Gradually add the wet ingredients to your dry mixture, stirring until the batter is smooth.
5. Add Boiling Water: Carefully stir in the boiling water to the batter. This will thin it out, which is normal.
6. Divide Batter: Pour the batter evenly into the prepared cake pans.
7. Bake: Place in the oven and bake for 30-35 minutes, or until a toothpick inserted in the center comes out clean.
8. Cool: Remove the cakes from the oven and let them cool in the pans for about 10 minutes. Then transfer them to wire racks to cool completely.
9. Frost Layers: Once cooled, place one layer on a serving platter. Spread a layer of frosting evenly on top. Repeat this with the other layers.
10. Decorate: Add fresh fruits, nuts, or sprinkles to enhance the appearance of your cake.
By following these steps, you can create fantastic love cake layers at home!
Nutrition
- Serving Size: 12
- Calories: 450 kcal
- Fat: 22g
- Protein: 6g