
Discover the Kitchen Tool Everyone Is Raving About!
- • Precision Engineered: Sharp blade with durable craftsmanship.
- • Comfort First: Ergonomic design for effortless slicing.
- • Stylish & Strong: Elegant wood handle meets stainless steel strength.
- • Risk-Free Pick: Thousands of happy home chefs can’t be wrong.
- • Today’s Deal: Just $29.95 instead of $99.85 — limited-time offer!
This post may include affiliate links — learn more here .
Introduction
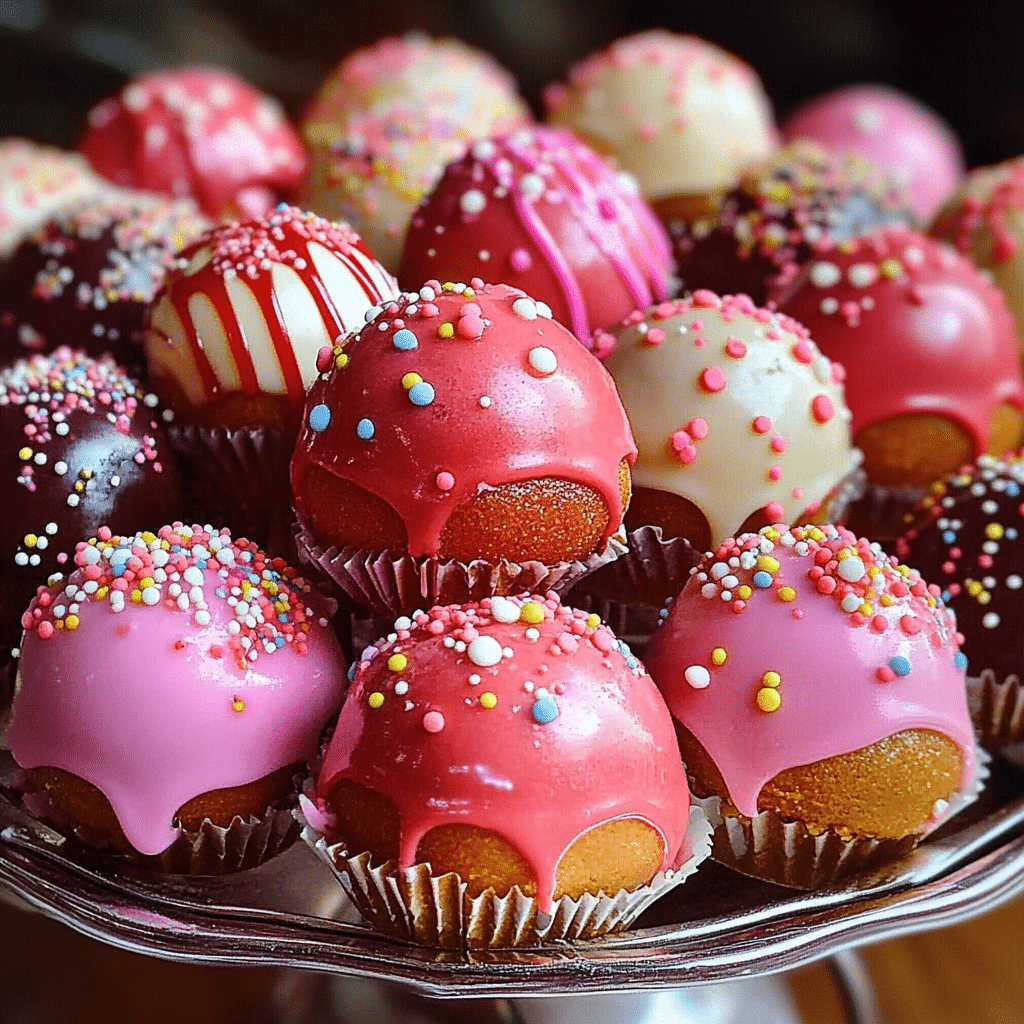
Cake Balls in the Cake Pop Maker are a fun and delicious way to enjoy cake in a new and exciting form. With the Cake Pop Maker, you can easily create perfectly round cake balls that are moist, flavorful, and perfect for any occasion. These cake balls are made with your favorite cake flavors, coated in chocolate or frosting, and decorated to suit any theme or celebration. Whether you’re hosting a birthday party, preparing treats for a holiday, or simply looking for a fun baking project, Cake Balls in the Cake Pop Maker are the perfect choice. Quick to make and easy to customize, these bite-sized delights will impress your guests and satisfy your sweet tooth.
Perfect for:
- Birthday parties
- Baby showers and weddings
- Holiday gatherings
- Special celebrations
- Afternoon snacks or treats
Why You’ll Love This Recipe
Here’s why Cake Balls in the Cake Pop Maker will become your new go-to treat:
- Endless Customization: You can use any cake flavor you like and decorate the cake balls to match your theme, making them perfect for any occasion.
- Easy to Make: The Cake Pop Maker simplifies the process, creating uniform, round cake balls in just minutes without the need for complicated techniques.
- Moist and Delicious: The cake balls stay moist and tender, especially when you add frosting, creating the perfect combination of cake and frosting in each bite.
- Fun for All Ages: Kids and adults alike will love these little treats, and they’re a great way to get everyone involved in the baking process.
- Perfect for Gifting: Package these cake balls into cute boxes or jars, and they make a great homemade gift for friends, family, or coworkers.
Preparation and Cooking Time
- Total Time: 1 hour
- Preparation Time: 15 minutes
- Cooking Time: 25-30 minutes
- Cooling Time: 10-15 minutes
- Servings: 24-30 cake balls
- Calories per serving: Approximately 100-120 calories (depends on cake and frosting used)
Ingredients
Here’s what you’ll need to make delicious Cake Balls in the Cake Pop Maker:
For the Cake:
- 1 box of cake mix (your choice of flavor)
- 3 large eggs
- 1/2 cup vegetable oil
- 1 cup water
- 1 teaspoon vanilla extract (optional, but adds great flavor)
For the Frosting:
- 1/2 cup butter, softened
- 2 cups powdered sugar
- 1/2 teaspoon vanilla extract
- 2 tablespoons milk or cream
For Coating:
- 1 1/2 cups chocolate chips or melting chocolate (milk, dark, or white chocolate)
- Sprinkles, crushed nuts, or candy toppings (optional)
Ingredient Highlights
- Cake Mix: Using a box cake mix simplifies the process, but you can easily make it from scratch for a more personalized touch. Choose from a variety of flavors like vanilla, chocolate, or red velvet.
- Frosting: The frosting adds richness and moisture to the cake balls. You can adjust the consistency to make it firmer or softer depending on your preference.
- Chocolate Coating: The chocolate coating gives the cake balls a smooth, glossy finish, while also adding a sweet, indulgent flavor. You can choose between dark, milk, or white chocolate, or even colorful candy melts for a more festive look.
- Toppings: Sprinkles, crushed nuts, or small candies can be added to give your cake balls a unique look and extra texture.
Step-by-Step Instructions

Follow these easy steps to make the perfect Cake Balls in the Cake Pop Maker:
Make the Cake:
- Prepare the Cake Batter: Preheat your oven according to the instructions on your cake mix box. In a large bowl, combine the cake mix, eggs, oil, water, and vanilla extract (if using). Mix until smooth and well combined, following the package instructions.
- Bake the Cake: Pour the batter into the Cake Pop Maker. Most cake pop makers have individual molds that can bake multiple cake balls at once, but be sure to fill each mold according to your maker’s instructions. Close the lid and bake for 5-8 minutes, or until a toothpick inserted into the cake comes out clean.
- Cool the Cake: Once the cake balls are baked, allow them to cool in the Cake Pop Maker for a few minutes before removing them. Transfer the cake balls to a wire rack to cool completely.
Make the Frosting:
- Prepare the Frosting: While the cake balls are cooling, make the frosting. In a medium bowl, beat the softened butter until creamy. Gradually add powdered sugar, vanilla extract, and milk, beating until the frosting is smooth and fluffy.
- Mix Frosting into the Cake: Once the cake balls have cooled, crumble them into small pieces in a large mixing bowl. Add in 2-3 tablespoons of frosting at a time and mix until the cake crumbs hold together. The mixture should be moist but firm enough to shape into balls.
Form the Cake Balls:
- Shape the Cake Balls: Take small portions of the cake-frosting mixture and roll them into tight balls, about 1 to 1 1/2 inches in diameter. You should be able to form about 24-30 cake balls, depending on the size.
- Freeze the Cake Balls: Place the shaped cake balls on a baking sheet lined with parchment paper and freeze them for about 10-15 minutes. This helps them firm up and makes dipping them in chocolate easier.
Coat the Cake Balls:
- Melt the Chocolate: In a microwave-safe bowl, melt the chocolate chips or melting chocolate in the microwave in 20-second intervals, stirring between each interval until smooth and fully melted.
- Dip the Cake Balls: Using a lollipop stick or fork, dip each cake ball into the melted chocolate, coating it completely. Tap the stick or fork gently to remove any excess chocolate.
- Decorate the Cake Balls: Before the chocolate sets, you can decorate the cake balls with sprinkles, crushed nuts, or candy toppings. Alternatively, you can drizzle contrasting chocolate over the coated cake balls for a decorative effect.
- Let the Chocolate Set: Allow the chocolate coating to harden at room temperature or place the cake balls in the refrigerator for 10-15 minutes to speed up the process.
Serve and Enjoy:
- Serve: Once the chocolate coating is fully set, your Cake Balls in the Cake Pop Maker are ready to be enjoyed! Arrange them on a serving platter or package them as gifts.

How to Serve Cake Balls in the Cake Pop Maker
Cake Balls in the Cake Pop Maker can be served in various ways:
- Party Treats: Serve the cake balls on a dessert table at parties, baby showers, or holiday gatherings. They make a fun and portable treat for guests of all ages.
- With a Hot Drink: Enjoy these cake balls with a cup of coffee, tea, or hot chocolate for an indulgent snack during your afternoon break.
- As Gifts: Package cake balls in decorative gift boxes or clear bags and give them as homemade gifts to friends, family, or coworkers.
- Themed Decorations: For special occasions like birthdays or holidays, decorate the cake balls with colored chocolate, themed sprinkles, or edible glitter to match the celebration theme.
Additional Tips for Cake Balls in the Cake Pop Maker
Here are some tips to perfect your Cake Balls in the Cake Pop Maker:
- Don’t Overmix the Batter: When mixing the cake batter, avoid overmixing, as this can lead to dense cake balls. Mix until just combined for the fluffiest results.
- Use Quality Chocolate: For the best flavor, use high-quality chocolate or chocolate melts. The chocolate coating is the star of the cake balls, so don’t skimp on the quality.
- Customize Flavors: Feel free to use different cake mixes or frosting flavors to match the occasion or your personal preferences. For example, try lemon cake with cream cheese frosting or chocolate cake with peanut butter frosting for a fun twist.
- Freeze the Cake Balls: Freezing the cake balls before dipping in chocolate helps prevent them from falling apart and makes the process much easier.
- Let the Cake Balls Set: After coating the cake balls in chocolate, be sure to let them set before serving. You can place them in the fridge to speed up the process.
Recipe Variations of Cake Balls in the Cake Pop Maker
Here are 10 variations of Cake Balls in the Cake Pop Maker you can try:
- Chocolate and Mint Cake Balls: Add a drop of mint extract to your chocolate cake and frost with mint-flavored frosting for a minty treat.
- Red Velvet Cake Balls: Make these cake balls with red velvet cake and cream cheese frosting for a rich, decadent flavor combination.
- Carrot Cake Balls: Use a carrot cake mix and cream cheese frosting for a spiced, flavorful cake ball option.
- Peanut Butter Cake Balls: Use chocolate cake and peanut butter frosting for a delightful peanut butter chocolate combination.
- Strawberry Shortcake Cake Balls: Make these with a strawberry cake mix and whipped cream frosting for a fruity, light option.
- Coconut Cake Balls: Add shredded coconut to the cake batter and frosting for a tropical treat.
- Chocolate Hazelnut Cake Balls: Add a layer of hazelnut spread between the cake and frosting for a nutty, creamy surprise.
- Cookies and Cream Cake Balls: Mix crushed Oreos into the cake batter for a cookies and cream flavor.
- Pumpkin Spice Cake Balls: Use a pumpkin spice cake mix with cream cheese frosting for a fall-inspired treat.
- S’mores Cake Balls: Add graham cracker crumbs to the cake batter and dip in chocolate for a s’mores-themed treat.
Freezing and Storage for Cake Balls in the Cake Pop Maker
- Freezing: You can freeze the cake balls for up to 3 months. Just place the fully coated cake balls in a single layer on a baking sheet, freeze them until firm, and then transfer them to an airtight container or zip-top bag for long-term storage.
- Storage: Store the cake balls in an airtight container at room temperature for up to 5 days. If you need to keep them fresh longer, refrigerate them for up to a week.
Special Equipment for Cake Balls in the Cake Pop Maker
Here are some special equipment items you might need for making Cake Balls in the Cake Pop Maker:
- Cake Pop Maker: A cake pop maker is the essential tool for making perfect round cake balls quickly and easily.
- Lollipop Sticks: For decorating and serving the cake balls on sticks.
- Microwave-Safe Bowls: For melting the chocolate or candy melts.
- Silicone Spatula: For stirring and mixing the batter and frosting.
- Piping Bags: For decorating the cake balls with additional frosting or chocolate designs.
- Baking Sheet and Parchment Paper: For cooling and freezing the cake balls.
FAQ Section about Cake Balls in the Cake Pop Maker
- Can I use homemade cake instead of a box mix?
Yes, you can use homemade cake batter, just make sure to bake it according to the cake pop maker’s instructions. - Can I make these cake balls gluten-free?
Yes, you can use gluten-free cake mix and frosting for a gluten-free version. - How do I know when the cake balls are done?
The cake balls are done when they’re golden brown and a toothpick inserted comes out clean. - Can I use different coatings besides chocolate?
Yes, you can use candy melts, frosting, or even powdered sugar for a different look. - Can I make these cake balls ahead of time?
Yes, you can make the cake balls ahead of time, store them in an airtight container, and dip them in chocolate just before serving.
Conclusion
Cake Balls in the Cake Pop Maker are an easy and fun way to create delicious, bite-sized treats for any occasion. With endless customization options, these cake balls can be made in any flavor, decorated to fit any theme, and served as the perfect snack or gift. Whether you’re making them for a party, family gathering, or just because, Cake Balls in the Cake Pop Maker will be sure to delight everyone who tries them.