

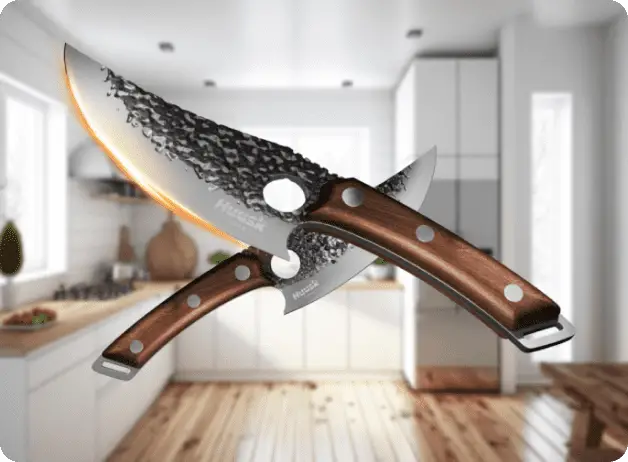
Discover the Kitchen Tool Everyone Is Raving About!
- • Precision Engineered: Sharp blade with durable craftsmanship.
- • Comfort First: Ergonomic design for effortless slicing.
- • Stylish & Strong: Elegant wood handle meets stainless steel strength.
- • Risk-Free Pick: Thousands of happy home chefs can’t be wrong.
- • Today’s Deal: Just $29.95 instead of $99.85 — limited-time offer!
This post may include affiliate links — learn more here .
Introduction
Oreo Truffles are the perfect blend of two favorites: the rich, chocolatey flavor of Oreos and the creamy, smooth texture of a truffle. These bite-sized delights are incredibly easy to make and require no baking, making them an ideal treat for any occasion. Whether you’re hosting a party, celebrating a special event, or simply want to indulge in a sweet snack, Oreo Truffles are sure to satisfy your cravings. The best part? They are simple to make, and with just a few ingredients, you can create a decadent dessert that looks as impressive as it tastes.
In this article, we’ll walk you through why Oreo Truffles are a must-try dessert, provide step-by-step instructions for making them, and share helpful tips and variations to suit your taste. Whether you’re a fan of the classic Oreo or someone looking for a new spin on truffles, this recipe is bound to become a favorite in your baking repertoire.
Why You’ll Love This Recipe
- Quick and Easy: Oreo Truffles don’t require baking, making them a perfect treat when you’re short on time but still want something impressive.
- Indulgent Flavor: The combination of crushed Oreos and cream cheese results in a sweet, smooth filling that pairs perfectly with the rich coating of chocolate.
- Versatile: Customize the truffles by adding different coatings or fillings, or experimenting with flavor combinations to suit your preferences.
- Perfect for Any Occasion: These truffles are perfect for birthdays, holidays, or even as a special gift for friends and family.
- No Special Equipment Needed: You don’t need a lot of special equipment or ingredients to make these truffles. Most of what you need is probably already in your kitchen.
Preparation Time and Servings
- Total Time: 1 hour (20 minutes for prep, 40 minutes for chilling)
- Servings: This recipe makes about 24 Oreo Truffles, depending on the size you make them.
- Nutrition Facts (per serving):
- Calories: 150
- Protein: 2g
- Carbs: 17g
- Fat: 9g
Ingredients
For the Truffle Filling:
- 36 Oreo cookies (or any sandwich cookie of choice): These serve as the base of the truffle, providing a rich, chocolaty flavor.
- 8 oz cream cheese (softened): The cream cheese binds the crushed Oreos together, creating a smooth, creamy filling that complements the chocolate coating.
For the Chocolate Coating:
- 12 oz semisweet chocolate chips: This is the classic choice for coating the truffles, providing a smooth, rich chocolate shell.
- 1 tablespoon coconut oil or vegetable oil: This helps the chocolate melt smoothly and creates a shiny, glossy finish on the truffles.
Optional Garnish:
- Crushed Oreos: To add an extra layer of flavor and texture, sprinkle some crushed Oreos on top of the truffles.
- White chocolate or milk chocolate: For a decorative drizzle, use melted white or milk chocolate to create a contrasting design.
- Sprinkles or crushed nuts: Use to garnish for a bit of extra fun or flavor.
Step-by-Step Preparation
FIRST STEP: CRUSH THE OREOS
- Prepare the Oreos: Start by placing the Oreo cookies in a food processor or blender. Pulse until they are finely crushed, resembling crumbs. You can also place the cookies in a large Ziploc bag and crush them with a rolling pin if you don’t have a food processor. Make sure to crush the Oreos into a fine powder for the best truffle consistency.
- Set the Oreo Crumbs Aside: Once the Oreos are fully crushed, transfer the crumbs into a large mixing bowl.
SECOND STEP: MAKE THE TRUFFLE FILLING
- Mix the Cream Cheese and Oreos: Add the softened cream cheese to the crushed Oreos. Using a hand mixer or stand mixer, blend the cream cheese with the Oreo crumbs until the mixture is smooth and well-combined. The mixture should hold together when you press it with your hands.
- Shape the Truffles: Once the filling is ready, scoop out about 1 tablespoon of the mixture and roll it into a ball using your hands. Repeat the process with the remaining filling, placing each truffle on a parchment-lined baking sheet or tray. You can make them smaller or larger depending on your preference, but about 1-inch truffles work best.
THIRD STEP: CHILL THE TRUFFLES
- Chill the Filling: Place the truffle balls in the refrigerator to chill for at least 30 minutes. This helps them firm up and makes them easier to dip into the chocolate coating.
FOURTH STEP: MELT THE CHOCOLATE COATING
- Prepare the Chocolate: While the truffles are chilling, melt the chocolate for coating. You can do this using a double boiler method on the stove or in the microwave. If using the microwave, heat the chocolate chips in 20-30 second intervals, stirring in between until smooth and fully melted.
- Add Oil to the Chocolate: Once the chocolate is melted, stir in the coconut oil or vegetable oil. This will help thin out the chocolate, making it easier to coat the truffles, and will also give it a shiny finish.
FIFTH STEP: DIP THE TRUFFLES
- Coat the Truffles: Once the truffles are chilled, dip each one into the melted chocolate using a fork or dipping tool. Make sure the entire truffle is covered with chocolate, then gently tap the fork on the side of the bowl to remove excess chocolate.
- Place on a Baking Sheet: Transfer the dipped truffles back onto the parchment-lined tray, making sure they are spaced apart so they don’t stick together. Allow the chocolate to set at room temperature or place the tray back in the refrigerator to speed up the process.
FINAL STEP: GARNISH AND SERVE
- Garnish the Truffles: While the chocolate is still soft, you can sprinkle crushed Oreos or your choice of toppings on the truffles. For a decorative touch, drizzle melted white or milk chocolate over the truffles in a zig-zag pattern.
- Let the Chocolate Set: Allow the truffles to sit for about 15-20 minutes or place them back in the fridge until the chocolate is firm.
- Serve: Once the chocolate is set, your Oreo Truffles are ready to enjoy! Serve them chilled, and savor the combination of smooth, creamy filling and rich chocolate coating.

How to Serve Oreo Truffles
Oreo Truffles are perfect for any occasion. Here are some ways to serve and enjoy them:
1. As a Gift for Friends and Family
Oreo Truffles make for a fantastic homemade gift. Package them in decorative boxes or gift bags, and share them with loved ones during the holidays, birthdays, or just as a thoughtful gesture.
2. At Parties and Gatherings
These bite-sized treats are easy to serve at parties, family gatherings, or any celebration. They’re perfect for nibbling, and their rich, chocolatey flavor will have everyone coming back for more.
3. For a Special Sweet Treat
When you’re craving something sweet but don’t want to spend a lot of time in the kitchen, Oreo Truffles are the ideal solution. They’re quick to make and perfect for satisfying your sweet tooth.
4. With Coffee or Hot Chocolate
Pair Oreo Truffles with a hot cup of coffee or hot chocolate for the ultimate indulgent treat. The chocolate and cream cheese complement the warmth of the beverages perfectly.
Additional Tips
- Make Ahead: You can prepare Oreo Truffles ahead of time and store them in an airtight container in the refrigerator for up to a week. This makes them great for preparing for parties or when you need a quick dessert.
- Freezing: Oreo Truffles can also be frozen for longer storage. After the chocolate has set, place the truffles in an airtight container and freeze for up to 3 months. To thaw, let them sit at room temperature for about 10-15 minutes before serving.
- Customizing the Flavor: You can experiment with different flavored Oreos, such as mint, peanut butter, or birthday cake, to create variations of the classic truffle.
- Vegan Version: For a vegan version, substitute the cream cheese with a non-dairy alternative and use vegan chocolate for the coating.
Recipe Variations
While the classic Oreo Truffles are delicious on their own, there are many ways to customize them to suit your preferences:
1. Add Some Crunch
If you love texture, try adding chopped nuts like almonds, pecans, or walnuts to the Oreo filling before rolling them into balls. This will add a bit of crunch to each bite.
2. Flavor Variations
You can use flavored Oreos, such as mint, peanut butter, or caramel, to create different flavor profiles. These variations will give the truffles an exciting twist while maintaining the rich Oreo flavor.
3. Decorative Toppings
For an extra touch, top your Oreo Truffles with festive sprinkles, colored sugar, or even small candy pieces. This will make them look more appealing and perfect for special occasions.
Freezing and Storage
Oreo Truffles are easy to store and freeze. After they have cooled and the chocolate has set, place the truffles in an airtight container. Store them in the refrigerator for up to one week, or freeze for up to three months. When freezing, place the truffles in a single layer and cover with plastic wrap or foil before sealing in a container to prevent sticking.
Special Equipment
You don’t need any fancy equipment to make Oreo Truffles, but a few items can make the process easier:
- Food Processor or Blender: To crush the Oreos into fine crumbs.
- Mixing Bowl: For combining the crushed Oreos and cream cheese.
- Dipping Tools: A fork or dipping tool helps make the chocolate coating easier.
- Parchment Paper: To line the tray for easy cleanup.
Frequently Asked Questions
- Can I use a different type of cookie for the filling? Yes! You can use any type of chocolate sandwich cookie, or even different flavored cookies, to create unique Oreo Truffles.
- Can I use milk chocolate for the coating? Absolutely! Milk chocolate is a great option if you prefer a sweeter coating compared to semisweet chocolate.
- Can I make Oreo Truffles in advance? Yes, you can prepare them ahead of time and store them in the refrigerator for up to a week, or freeze them for longer storage.
- Are Oreo Truffles gluten-free? Unfortunately, traditional Oreos contain gluten. However, you can use gluten-free cookies to make the truffles gluten-free.
- Can I add flavorings to the cream cheese filling? Yes, you can add vanilla extract, peppermint extract, or any other flavoring to the cream cheese filling to customize the taste.
Conclusion
Oreo Truffles are an irresistible treat that combines the beloved flavors of Oreos with the smooth, creamy richness of chocolate truffles. Whether you’re preparing them for a special occasion or just craving a sweet snack, these bite-sized delights are sure to satisfy. Quick to prepare and easy to customize, Oreo Truffles are the perfect treat for any occasion. Try them today, and indulge in the ultimate combination of creamy, chocolatey goodness!